Mascara isn’t just the final step of your eye makeup routine. One swipe of this staple beauty product can enhance your natural lashes, add an element of drama to any look, and draw attention to one of your most gorgeous facial features.
Want to learn how to put on mascara like a pro? We’re sharing a complete guide to achieving striking, falsie-free lashes. Try these go-to mascara tips and a formula that can help give you optimal curl, length and volume.
What is the best way to apply mascara?
The perfect application starts with a lash primer, makeup remover and mascara—we’re currently loving our Turbo Lash High-Powered Volume + Length Mascara. You may also want to have a few optional tools on hand, like an eyelash curler, to customize your final look.
What’s the best mascara for me?
Do you want lashes with extra length? Or, maybe a boost of volume? The first step in your mascara routine should be selecting a formula that can give you the final look you desire.
Choose from different formulas like:
• Lengthening mascara – To extend and lengthen the appearance of your lashes.
• Volumizing mascara – For adding volume and length to your lashes.
• Curling mascara – To help enhance the natural curl of your lashes.
• Thickening mascara – Can create the appearance of thicker-looking lashes.
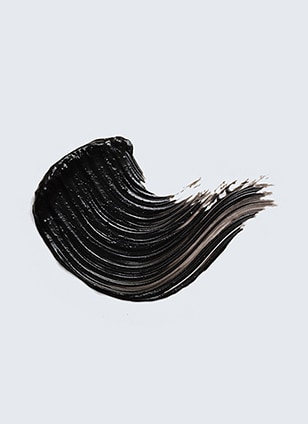
Can’t decide on which type of mascara is best for you? Our Turbo Lash High-Powered Volume + Length Mascara has the power to do it all. It can provide 12-hour length, volume and curl. Plus, the formula is infused with 100% naturally derived* Maracuja, Argan and Castor oils that help protect and condition lashes for a stronger, fuller-looking appearance.
When should I apply mascara?
Mascara should be the final step in your eye makeup routine—so make sure your eyeshadow, eyeliner and concealer are applied first before reaching for it.
How To Apply Mascara
Step 1: Prime Your Lashes
Get the most out of your mascara by priming your lashes first. Just like using face primer before foundation, lash primers can help give your mascara extra staying power and prep them for the perfect application.
Pro tip: Our Little Black Primer™ can be used before and after mascara application to amplify and set as a long-wearing, smudge-proof top coat.
Step 2: Apply Mascara To Your Top Lashes
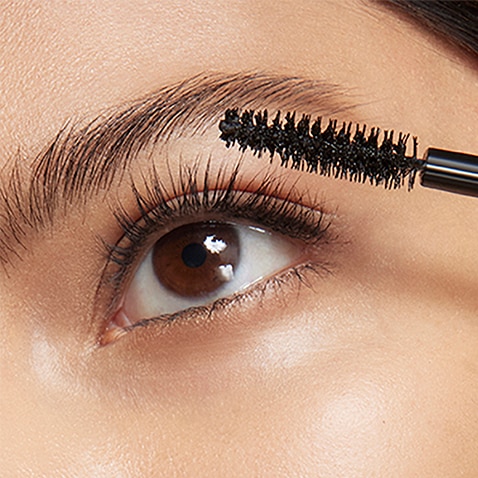
Starting at your natural lash line, lift your lashes with your wand, curling and twisting it as you go from base to tip. Wiggle your wand back and forth as you lift to create separation and ensure that each lash is evenly coated. Repeat this step to build up the mascara and create a more dramatic effect.
Step 3: Apply Mascara To Your Lower Lashes
When it comes to your delicate lower lashes, gently apply product in a sweeping motion to the roots using the tip of your wand.
Step 4: Clean Up Any Smudging
Mascara application isn’t always perfect, but the good news is that makeup mishaps are easy to fix. Use a cotton pad or a Q-Tip and a few drops of Gentle Eye Makeup Remover to sweep any clumps or flakes away without leaving behind any residue.
Step 5: Set Your Look
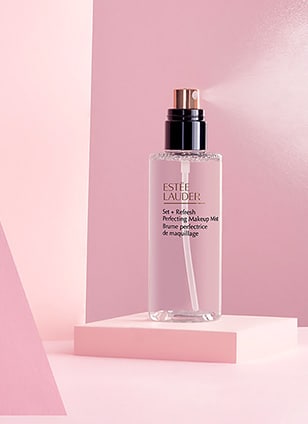
Now that that you’ve got the perfect mascara application, all that’s left to do is set your makeup. Use a few spritzes of setting spray like Set + Refresh Perfecting Makeup Mist on your entire face to set your look for the day.
More Mascara Tips:
• Customize Your Curl: Use an eyelash curler to enhance the curl of your lashes before applying your mascara. Place the curler at the base of your lashes, clamp it and hold for 10 seconds before releasing.
• Feline Fine: For a cat eye effect, focus your mascara on the outer corners of your lashes only, sweeping out and upward for a lifted, dramatic look.
• Clump-Free Lashes: When you remove your mascara wand from the tube, gently remove any excess product before applying to your eyes. This will help you avoid applying too much which can create clumping.
• Double Duty: Amp up the drama by coating the top and bottom of your upper lashes with mascara.
*Per ISO Standard 16128. From plant sources, non-petroleum mineral sources and/or water.


